Controlling and regulating equipment by means of microcontrollers has become indispensable. Our students will frequently have to deal with installations with one or more microcontrollers in their later work environment.
Brief description
In this series of lessons and labs, students get acquainted with the programming of microcontrollers. In this way, we form the link between application development (programming) and the control of equipment (electrical engineering). The knowledge and experience from this series serve as foreknowledge for a professional orientation, or as a basis for a further study choice.
Students learn to build simple circuits and connect these to the microprocessor. Students are introduced to programming skills and programming a simple application with the Arduino. After this series, participants can design and build their own first programmable prototype.
Target group
The series of lessons and labs are designed as a block of approximately 3 months for MBO students. By varying the depth during the performance, the series is suitable for a wide audience.
Foreknowledge
No prior knowledge required.
Continuation
The skills acquired are then applied in a specific application, in the following block:
https://junioriot.org/lesson-arduino-gps-tracker-ttn/
Lesson duration
A block of about 3 months, weekly one lesson of 90-120 minutes completed with lab of 90-120 minutes.
Learning Content & key objectives
- Technology skills
- taking the initiative, self-regulation, working together
- STEM skills, operating and applying computer equipment
Connecting to
- Cisco NetAcad, IoT Fundamentals: Connecting Things
Technologievaardigheden
- Electronics:
- Recognizes and realizes simple circuits
- Soldering, circuit building, and design
- Evolve the ability to read simple electrical diagrams
- Handling measuring and testing equipment
- Microcontrollers:
- Recognize parts around the microcontroller and name function
- Recognize different single board computers and single-chip solutions
- Naming applicability of different types of computers/chips for programmable circuits
- Realizing and recognizing programmable circuits
- Programmeren:
- Recognizing programs in C++, and being able to customize them
- Recognizing and interpreting simple programs
- Self-programming for the microcontroller to control equipment or components
- Recognize diagrams of programmable circuits (block diagram, ladder)
- Sensoren en actuators:
- Applying and reading sensors, data processing, and data communication and/or actuator control
- Recognizing and naming different sensors and actuators and describing the application
- Building and programming a simplified application with sensors and motor according to instructions
Workshop
Required tools and machines:
- Laptop with Arduino IDE, drivers for Arduino Nano, USB connection cable for Arduino.
- Simple soldering workstation; temperature-controlled electronically adjustable soldering iron for electronics between 8 and 60 watts, mat, support, sponge; 0.5 mm soldering tin (containing lead).
- Teaching environment with the screen, extension cords, distribution boards, work tables for simple lab environment. If a lot of soldering is done (which is not the case) then also point extraction, otherwise sufficient ventilation through a window. Possibly carbon filter fan.
- Lipo battery chargers, glue gun, tie-reps, tape, etc.
Materials
Materials per participant-
- A vibrating robot, RGB light circuit, PCB exercise. per student: 4x CR2032 battery, 4x battery holder BS05, 10x LED, 1x RGB LED, 8x switch, 3x push-button, 1x vibrating motor 3v, 1x mini PCB, single-core wire.
- Arduino programming, per student: 1x Arduino Nano 168, 3x LED, 1x RGB LED.
- Arduino Neopixel; per three students: 1x Arduino Nano 168, 1x neopixel stick; headers, jumper wires, breadboard.
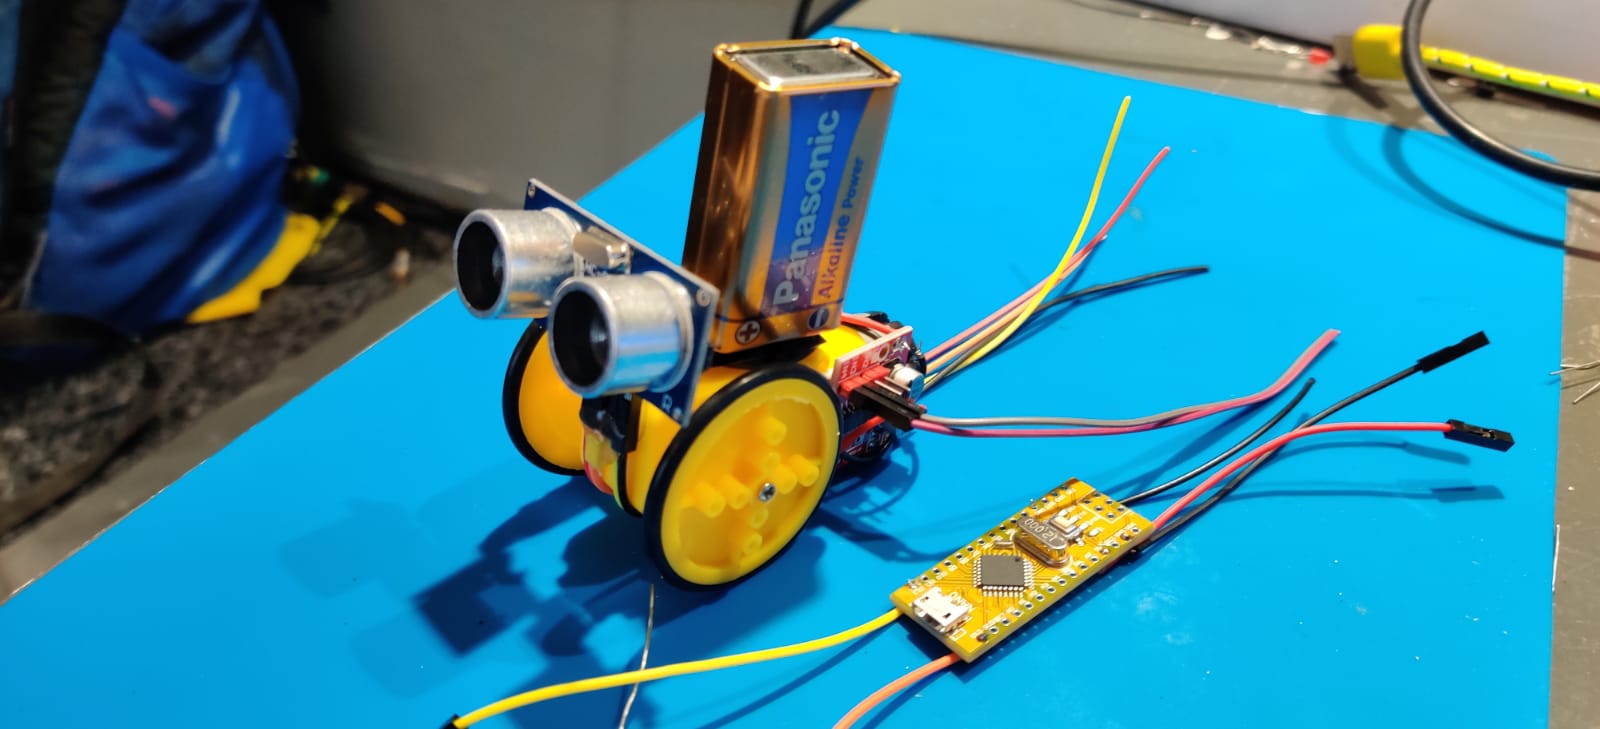
- Motor control exercise, distance sensor exercise and the sensor stop truck challenge: Per three students: 1x Arduino Nano 168, 1x ultrasonic sensor, 1x motor controller board, 1x 3-6v motor with wheels, 9v battery, 9v battery connection cable, jumper wires, wrapping wire.
Lab test
The lab test consists of a recurring pitch moment, per person. In each lab, you may be asked to explain what you are doing. Imagine that this is your manager’s manager, who comes to see what’s going on on the shop floor. Your pitch is short, clear and testifies to knowledge and insight.
You make sure it’s your turn. So this is not all possible in the last minutes of the lab. The first round is an exercise and does not count.
- The technique, correct and sufficient content.
- Briefly, it fits in 30-90 seconds (succinctly) or you need 5 minutes (not succinctly).
- Completeness tells your story what we see in your Lab.
- Passion, you can convey to the listener why your solution is a good one. Or let them know that you’re working through the night. Or surprise us with extras.
- Lab result, you’ve been able to build what was intended…
You score a maximum of 5 times 2 points, and your grade is an addition.
Lab log
You write your personal lablog in a way that we (public or not) can access it. You can use it to describe the results of your weekly labs, on average half an A4 page per lab including photos. You can also describe your final project, which you write as a transfer document to a colleague who will continue your work with the same training.
Here you score points on the same criteria: Technique, Compactness, Completeness, Passion and Result.
Lesson program
Each block has 10 weeks, one of which is reserved as a buffer week.
Week 1. Introduction and first lab
- Theory. The goal is to give an interesting approach to the teaching of hardware and IOT. Our approach is focused on the LABs, and meanwhile, we are growing in employee skills.
- Self-regulation and collaboration. https://junioriot.nl/zelfregulatie-en-samenwerken/
- Theory NetAcad: 0. Welcome to IoT Fundamentals: Connecting Things.
Overview: this training teaches you on circuits and software. Labs: digital, on physical equipment, packet tracer (network simulation tool). Quiz and exams for the course are available in the Cisco Networking Academy. - Teaching materials NetAcad: 1. Things and Connections.
- LAB – Build a vibrating robot – https://junioriot.nl/soldeeroefening/
Each participant builds an item that can be taken home.
we explain how to handle the soldering iron neatly and safely.
we explain that you should never solder on a battery, and why (S&T).
You test the battery with an LED and examine which battery holder legs you use to turn the LED on.
You build your own vibrating robot with battery, battery holder, vibrating motor – and add a switch if necessary.
Battle? - No lab test.
Week 2. First circuit.
- Theory
- explanation what is electronics, what is a power circuit
- circuits and spelling
- Theory NetAcad: 2.
- Prepare installation of Arduino IDE,
- install Arduino: https://www.arduino.cc/en/main/software
- install driver 01 en 02: arduino_nano_drivers
- Installing drivers does not work from the zip file, first unpack to for example C:\drivers\
- Introducing a way of generating figures:
- Lab tests (today a trial round)
- Lab log – make your own log per person; a short piece of what you are proud of or what you have learned new including photos on average half an A4 a week. The most valuable thing is that you describe what went wrong and how things should be improved. Write this as a transfer document for the work environment.
- LAB
– RGB Light Organ – https://junioriot.org/rgb-lightorgan/
– Own circuit on a circuit board – https://junioriot.nl/circuit-op-printplaat/
– Trial LAB test: Present or tell about your lab experience and your result.
Each participant builds an item that can be taken home.
Week 3. How it works programming the Arduino Nano.
- Theory.
- Explanation of what is a microprocessor.
- Difference between the different types of processors and single-board applications; Arduino, ESP, Raspberry Pi, Microbit, FPGA, GPU, intel chips, … Which ones do you know more.
- Comparison of applications; mobile phone, laptop, PLC, mainframe, …?
- Showing different examples, Arduino, Raspberry Pi, microbot, PC/laptop, PLC, CNC and Robotics controllers.
- Theory – NetAcad: a repeat of the controllers slide
- LAB
– Is the Arduino IDE installed, and do you have the drivers yet?
– Blink Extreme – https://junioriot.org/arduino-nano/
– Possibly also: Blink no Delay – https://junioriot.org/blink-no-delay/
Each participant builds an item that can be taken home. Take it with you next time. - LAB test: Present or tell about your lab experience and your result, as a short elevator pitch to a client.
Week 4. Intermediate week
- Theory, recognize what you saw. With the Arduino IDE and google search on the screen?
- Software structures: If then else (there are no more goto’s), for- loop, while, functions with or without parameters…
- Instruction: for your information, at the end of Block 2 (IOT) you’ll execute your own project in teams. Last week and what we are going to do is all part of the preparation for this. Now go ahead and brainstorm how you can make a realistic application with this experience. You can make a cup in the Lab blog: “Idea for my project”.
- Working on your Lab blog.
- Theory, NetAcad: H3, software.
- LAB – with your own Arduino from last week:
– Blink Extreme, now you do it yourself – https://junioriot.org/arduino-nano/
– Blink no Delay – https://junioriot.org/blink-no-delay/
With a loan of Arduino and a breadboard:
– Arduino a NeoPixel https://junioriot.org/arduino-neopixel/
Present or tell about your lab experience and your result, as a short elevator pitch to another.
Week 5. Sensor/actuators on Arduino
- LAB – Sensor trolley on USB power – motor control via BLINK.
Per team of 3 an item, Arduino on a breadboard
– Arduino distance sensor https://junioriot.org/arduino-afstandsensor/
– motor controller via Blink https://junioriot.org/arduino-blink-motorcontroller/
– Arduino stop motor – https://junioriot.nl/werkblad-arduino-stopmotor/
One item per team of 3 participants - Theory NetAcad Sensors and Actuators
- Theorie:
- Digital output versus analog outputs.
- Blink is digital on/off.
- What else can I do? A PWM output, what’s that?
- Battery 9 volts, how do we make something out of this for the Arduino?
- On-board converter, 500 mA.
- Converter boards 0,5 ampere, converter on motor controller.
- Motor controller.
- Battery 9 volts, how to make the voltage for the motor for fast/slow control –> pwm.
- Digital output versus analog outputs.
Week 6. Sensor driven PWM control
- LAB 2 – Sensor and motors, the Sensor trolley on battery – convert to 9 volt battery.
– PWM on the motor controller https://junioriot.nl/arduino-pwm-motorcontroller/
– Arduino volgmotor https://junioriot.nl/werkblad-arduino-volgmotor/
This is a software modification from the previous lab. - Theorie NetAcad Software is everything.
– Libraries, programming structures, software layers (database, business logic and application logic; MVC model view controller).
– #defines –> compiler command versus programming code
Week 7. Battle Lab (teams) + LAB Log review / presentation / elevator pitches.
Week 8. LAB project – your robot car + part 2 of LAB Log review / presentation / elevator pitches.
Week 9. Reserve LAB project; start of IOT
De laatste lessen leggen we de brug naar IOT onderwerpen.
- Lesson material – preparation for IOT series.
what places in your world do you recognize sensors,
…dates?
… communication?
… actuators or display in displays?
How do you choose (the quality of) the components you are going to build with?
Showing different sensors