In deze oefening brengen we samen wat we geleerd hebben van de Arduino met de motorcontroller, en de Afstandsensor HC-SR04.
Ties heeft het in onze werkplaats al een keer voorgedaan. Hij gebruikte de volgende onderdelen:
- Een 9 volt batterij.
- Aansluit stukje voor 9 volt batterij.
- HC-SR04 ultrasoon sensor (uitleg).
- Arduino Nano.
- LN298N mini motor controller.
- Motor met plastic gear, 3-6 volt of 3-12 volt https://nl.aliexpress.com/item/4000226014866.html
- Extra wielen https://nl.aliexpress.com/item/32828057757.html
- Jumperwires, tie-wraps, dubbelzijdige tape.
En daarbij had hij nodig:
- Laptop met Arduino IDE.
- Soldeerwerkplek met temperatuur geregelde soldeerbout voor electronica.
- Usb kabel.
- Smeltlijm pistool.
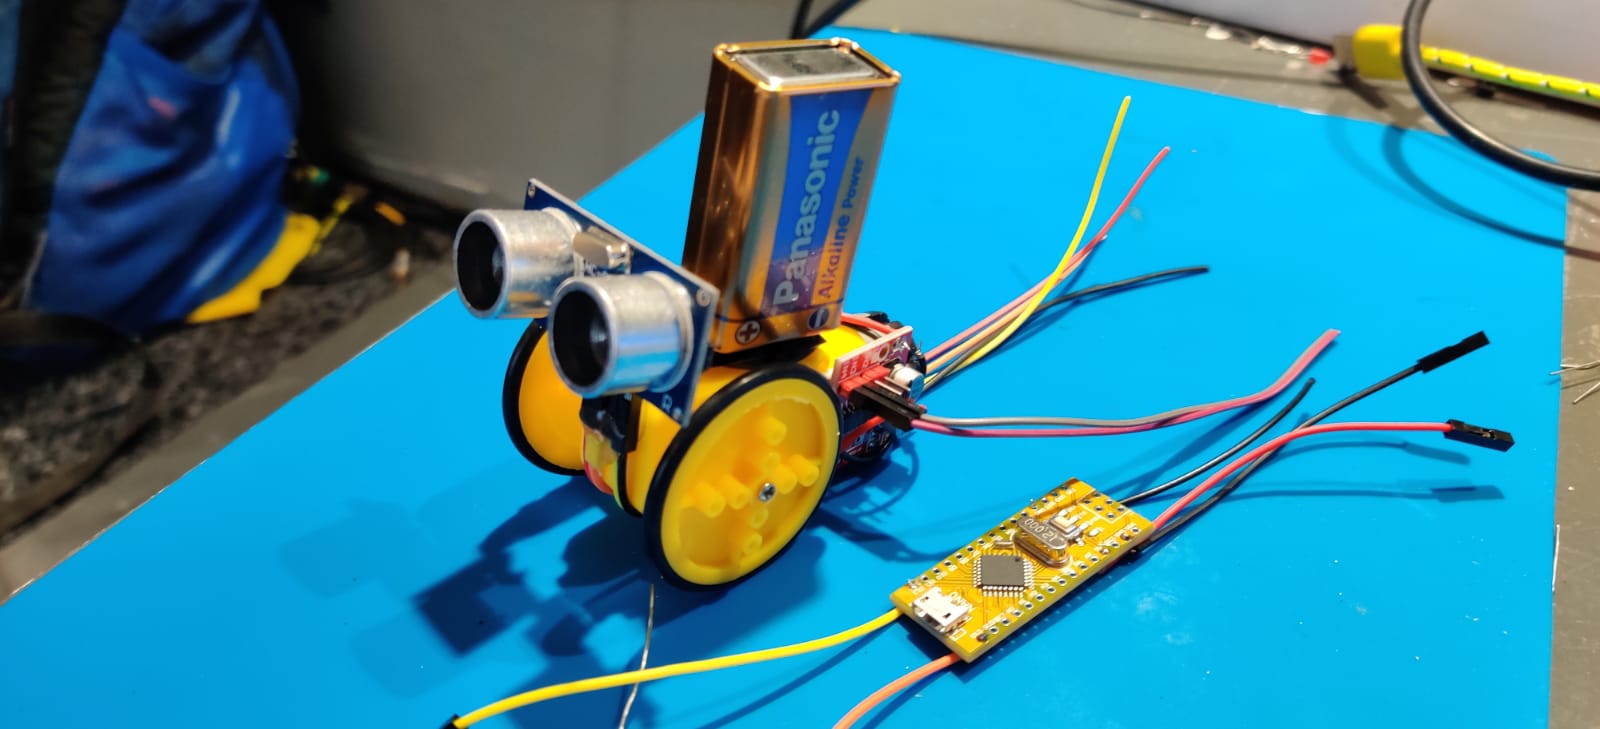
Geduldig heeft hij een paar versies gemaakt, en de laatste versie zie je op deze foto:
In de eerdere oefeningen hebben jullie de motor controller al eens aangesloten, en de ultrasone sensor. Als je dezelfde pin nummers hebt aangehouden als wij in deze oefening hebben gedaan, dan kan je beide oefeningen zo bij elkaar aan de Arduino monteren.
- Sluit de motor en de motor controller aan volgens schema.
- Met de blink laat je de motor draaien.
- We leggen uit hoe een IF statement in C++ wordt geprogrammeerd.
- Je combineert beide programma’s zodat je machine rijdt en op 10cm vanaf de muur stopt.
- Battle, stort niet in het gat. Tafel staat op 10 cm vanaf de muur. Teams racen naar het gat, maar stoppen zo dicht mogelijk bij de muur.
Uitdaging; je laat de auto naar een muur rijden en de auto moet op tijd stoppen. Hoe pas je nu het voorbeeld programma van de afstandsmeter aan, zodat de motor gaat draaien tot hij dichtbij de muur is?
Challenge: We zetten een tafel op een afstand van bijvoorbeeld 10 centimeter van de muur. Lukt het je om zo dicht mogelijk bij de muur te komen zonder in het gat te vallen?