This workshop is the first step in the Junior IOT series ‘Chips in Schools’. In this workshop, our students use the microscope to explore tiny LEDs. In our soldering and programming workshops, they may have worked with LEDs. Especially the princess LEDs (Blink LEDs) and RGB LEDs are found to be extra special.
The microscope gives us an exploration of the tiny things inside the chip world. As an extra, some of us may be able to make a tiny little light!
Some things you may already know:
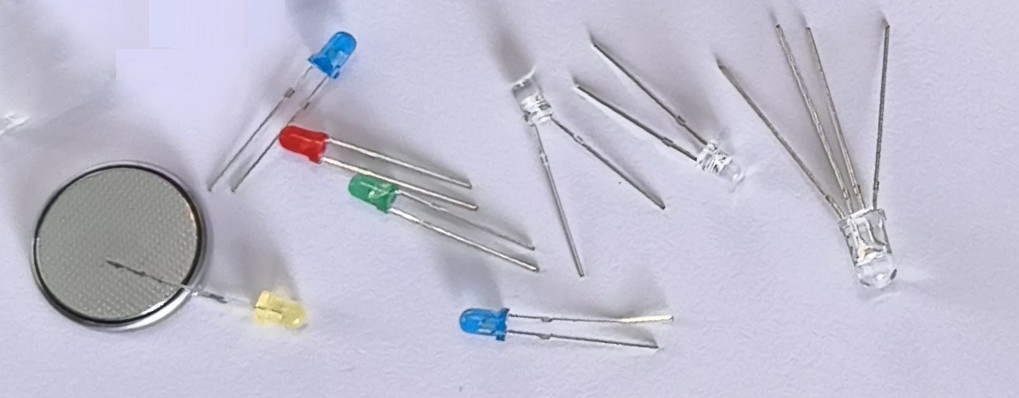
In the Junior IOT workshops we have used LEDs and batteries. The LED is build to give light. The outside of a LED seems to be made of plastic. Most LEDS we have worked with have two pins. You can use a battery to make them work, and sometimes you’ll need to flip them around.
A special type of LED is the RGB LED. This one is transparent with 4 pins. Some of you may already have played with this one. The longest pin goes onto one side of the battery, and the other pins are for red, green and blue.
The princess LED has two pins, but gives all colors of light anyways. Would you think there is something smart inside this one that makes this happen?
The worksheet
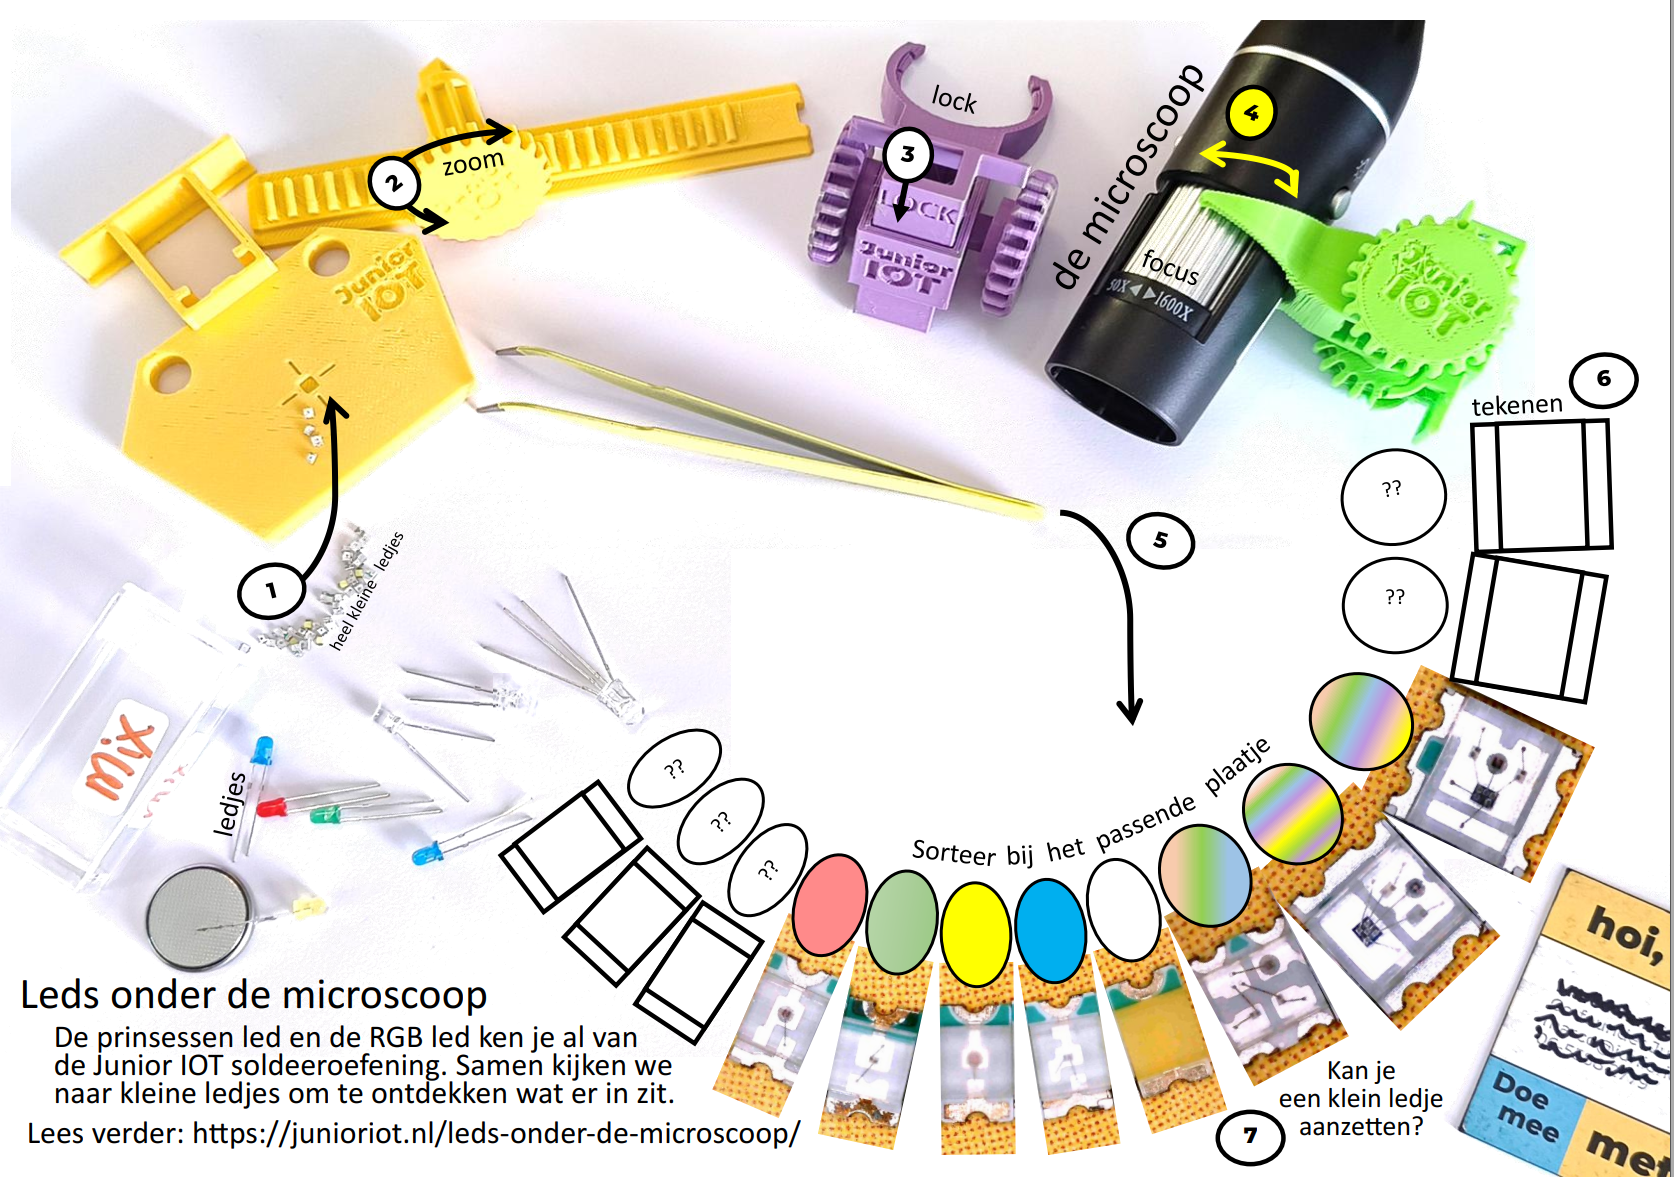
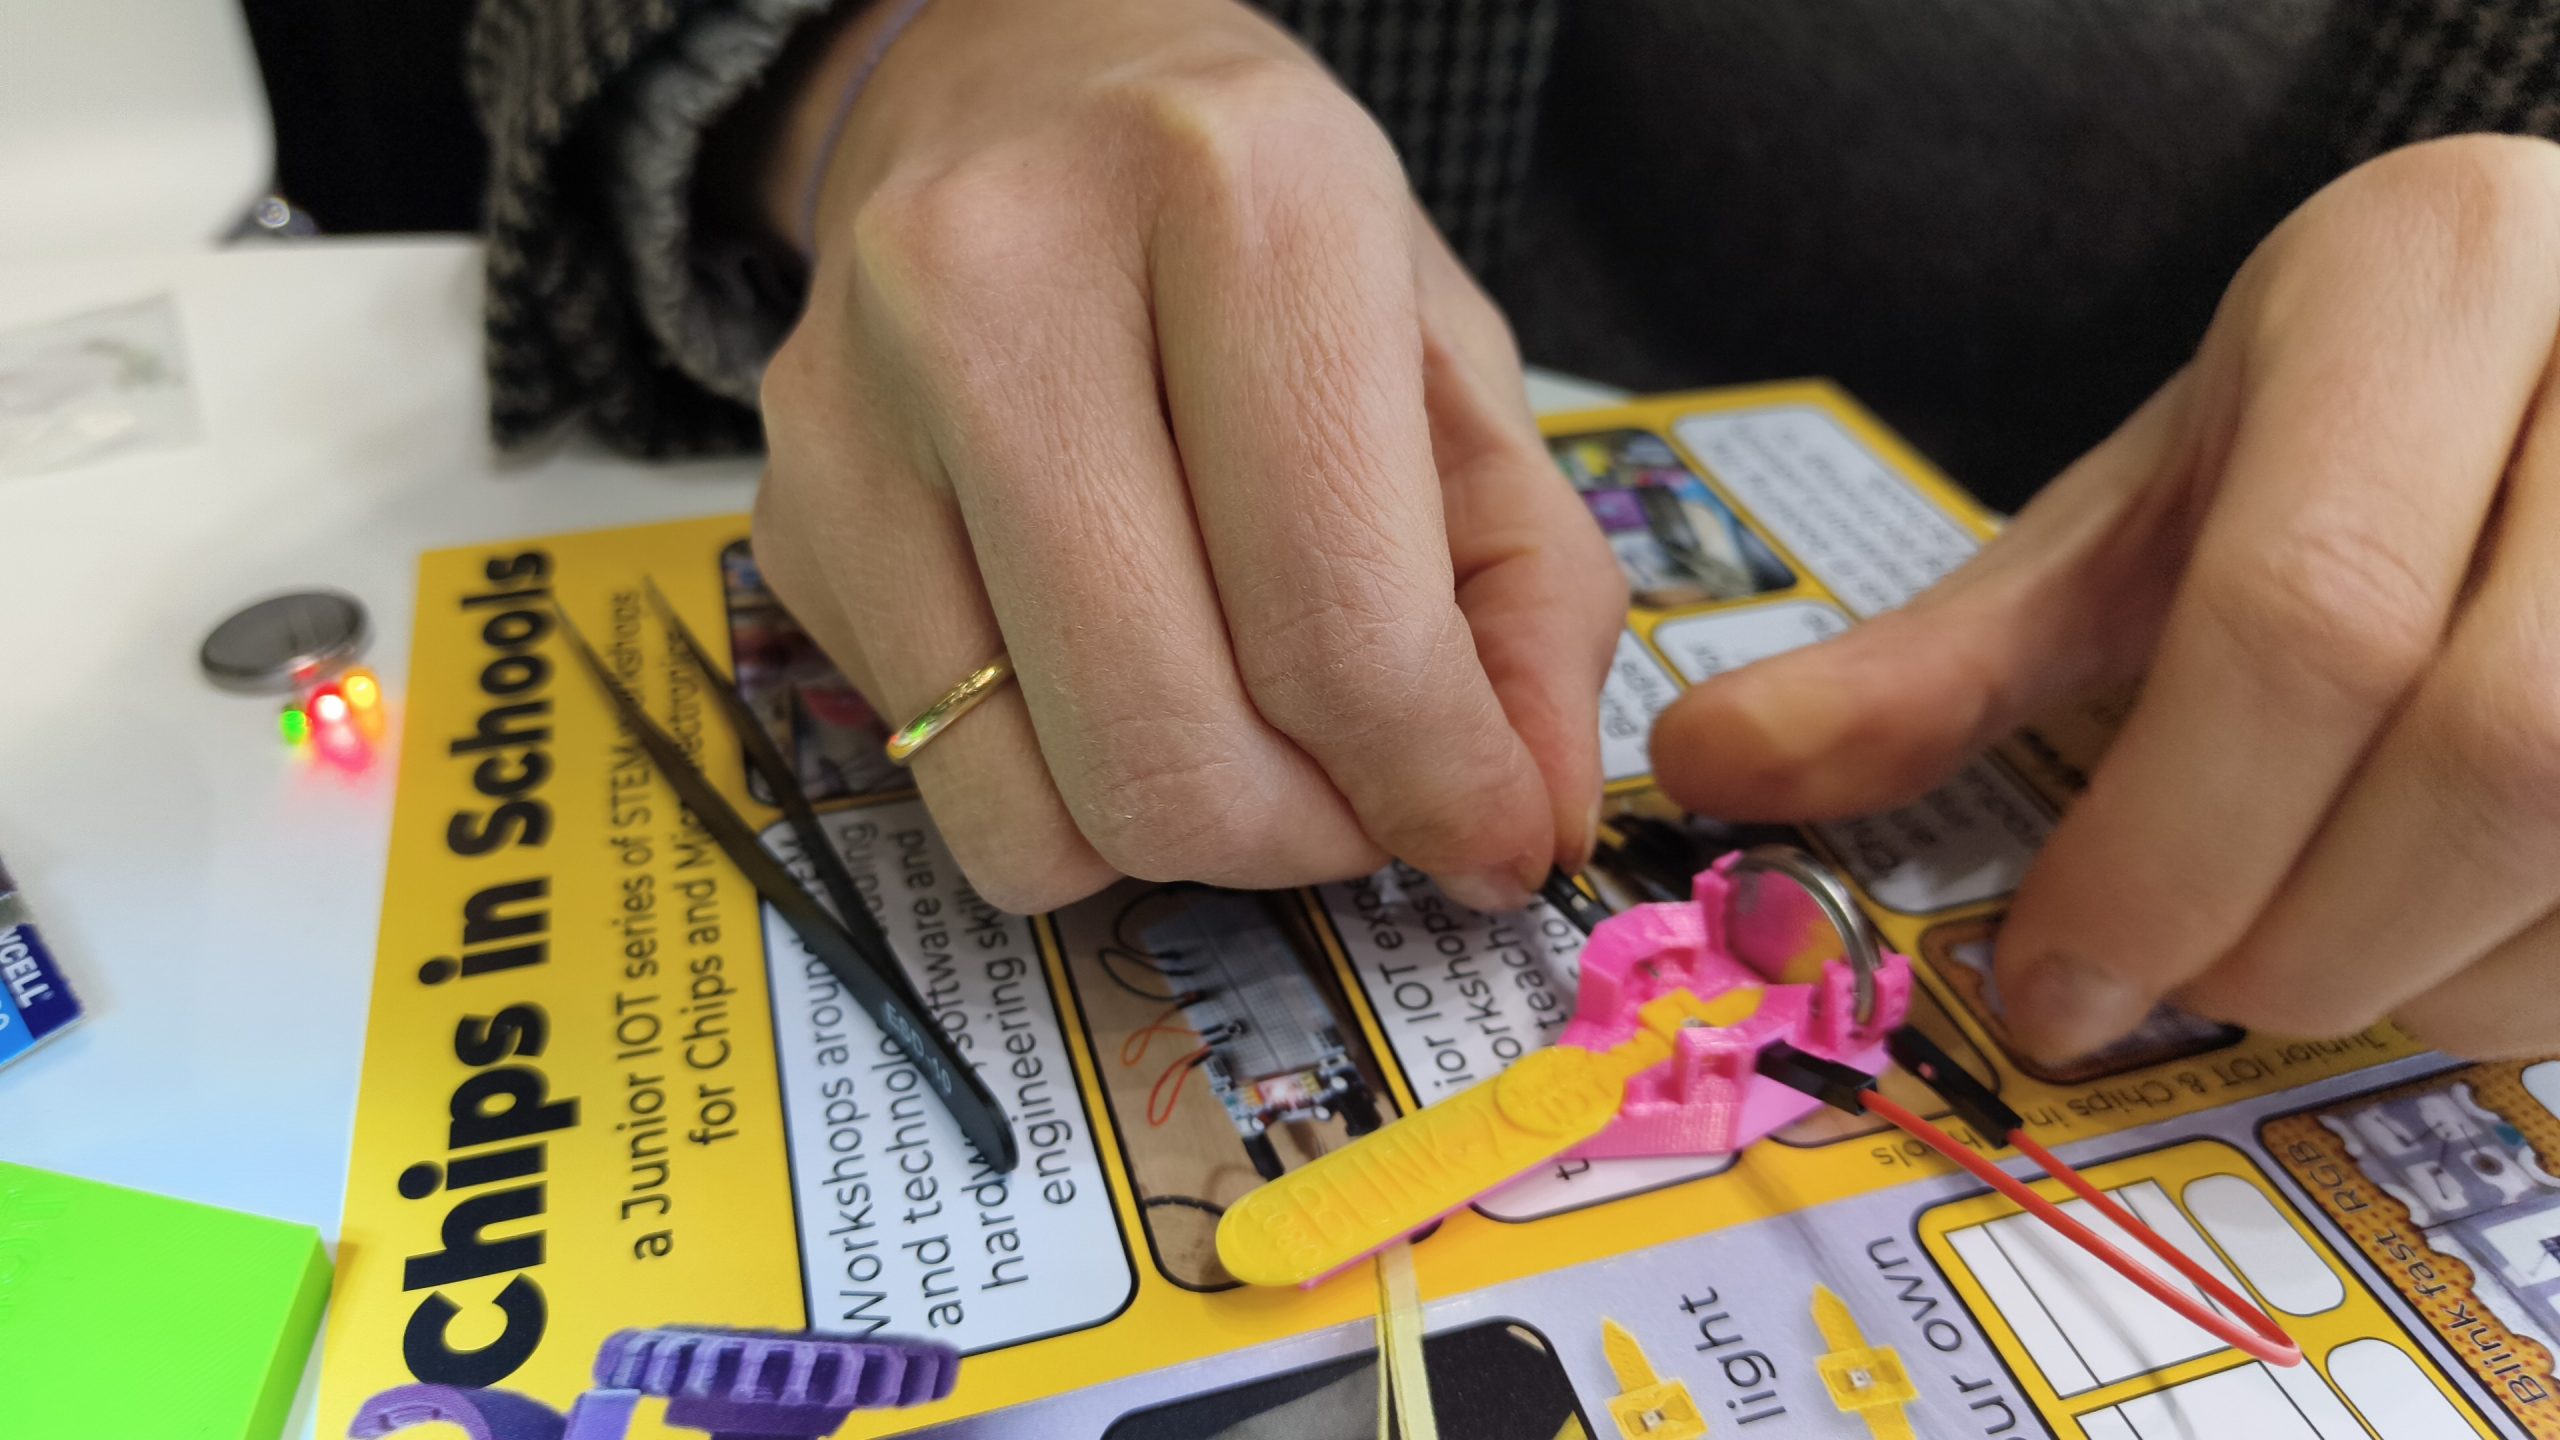
With this workshop it is fun to use the Junior IOT worksheets. You can place the items on the worksheet. You can click the image below to see more details.
Very tiny LEDs
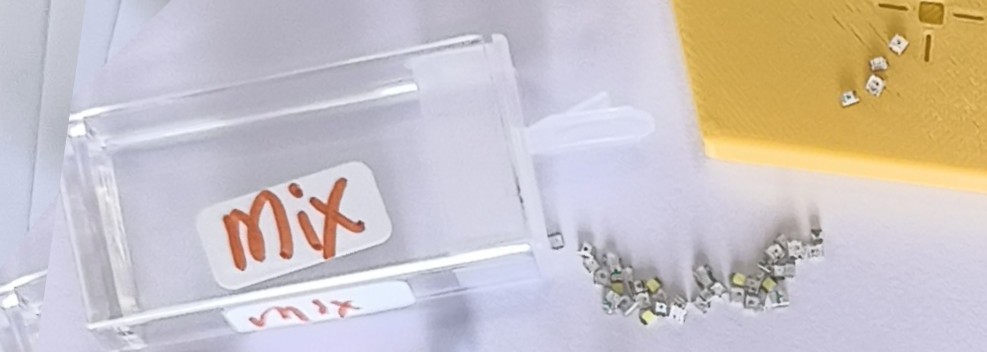
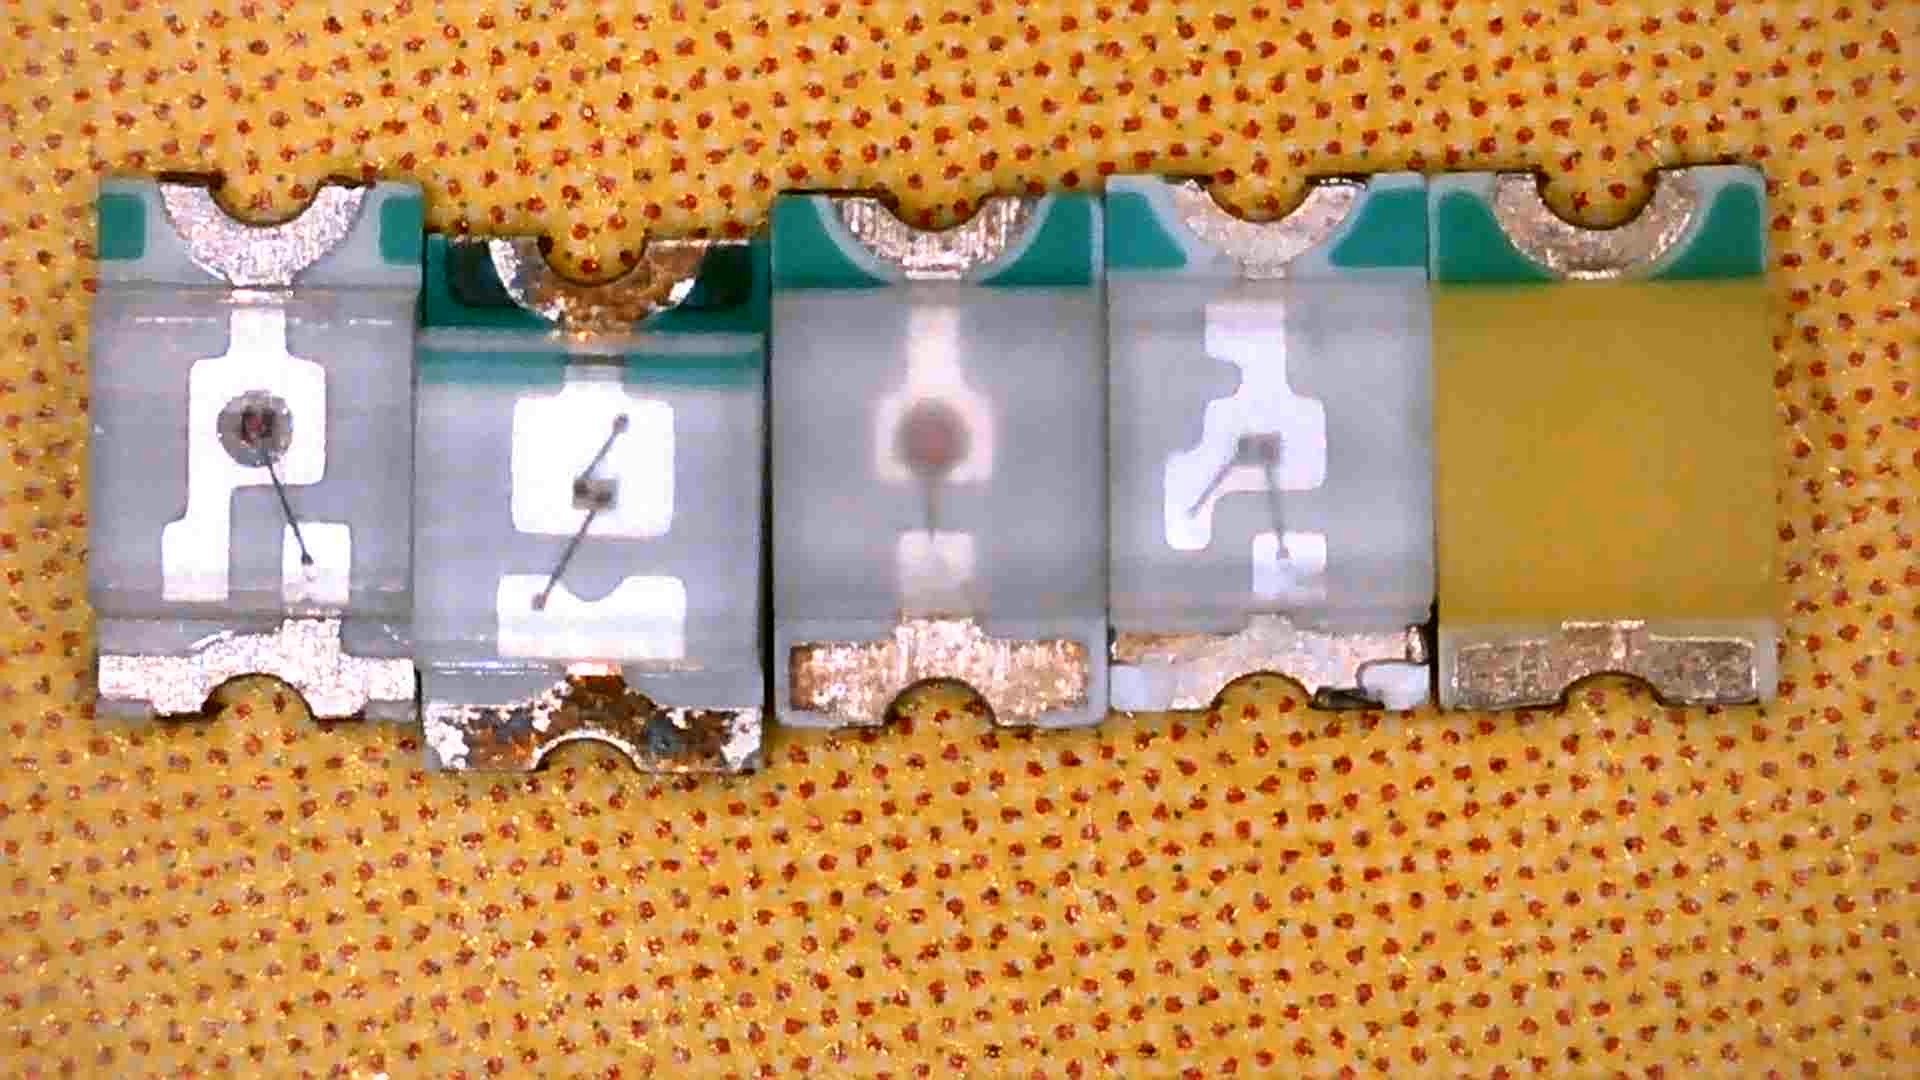
For this workshop we have selected very tiny LEDs, smaller than 2 millimeter. These we can study trough the microscope.
Most devices that have a light or a display, will use technology based on LEDs. Can you recognize some of these items around you? Would your world be much different without LEDs?
The microscope
In this workshop we use the USB microscope. The USB cable needs to be connected to a computer to view the image.
- Connect the USB plug of the microscope to your computer.
- Press the ‘Windows’ key, type ‘cam’, and open the camera viewer.
- In the right top, click on the arrows icon to view the camera of the microscope.
Tip: Use the Photo-button to capture an image for your report. This microscope takes a nice image. There are also cameras available with a higher resolution.
Tip 2: If you use a special microscope with a resolution over 2 megapixel, you may need to press the gears icon and select the highest resolution available.
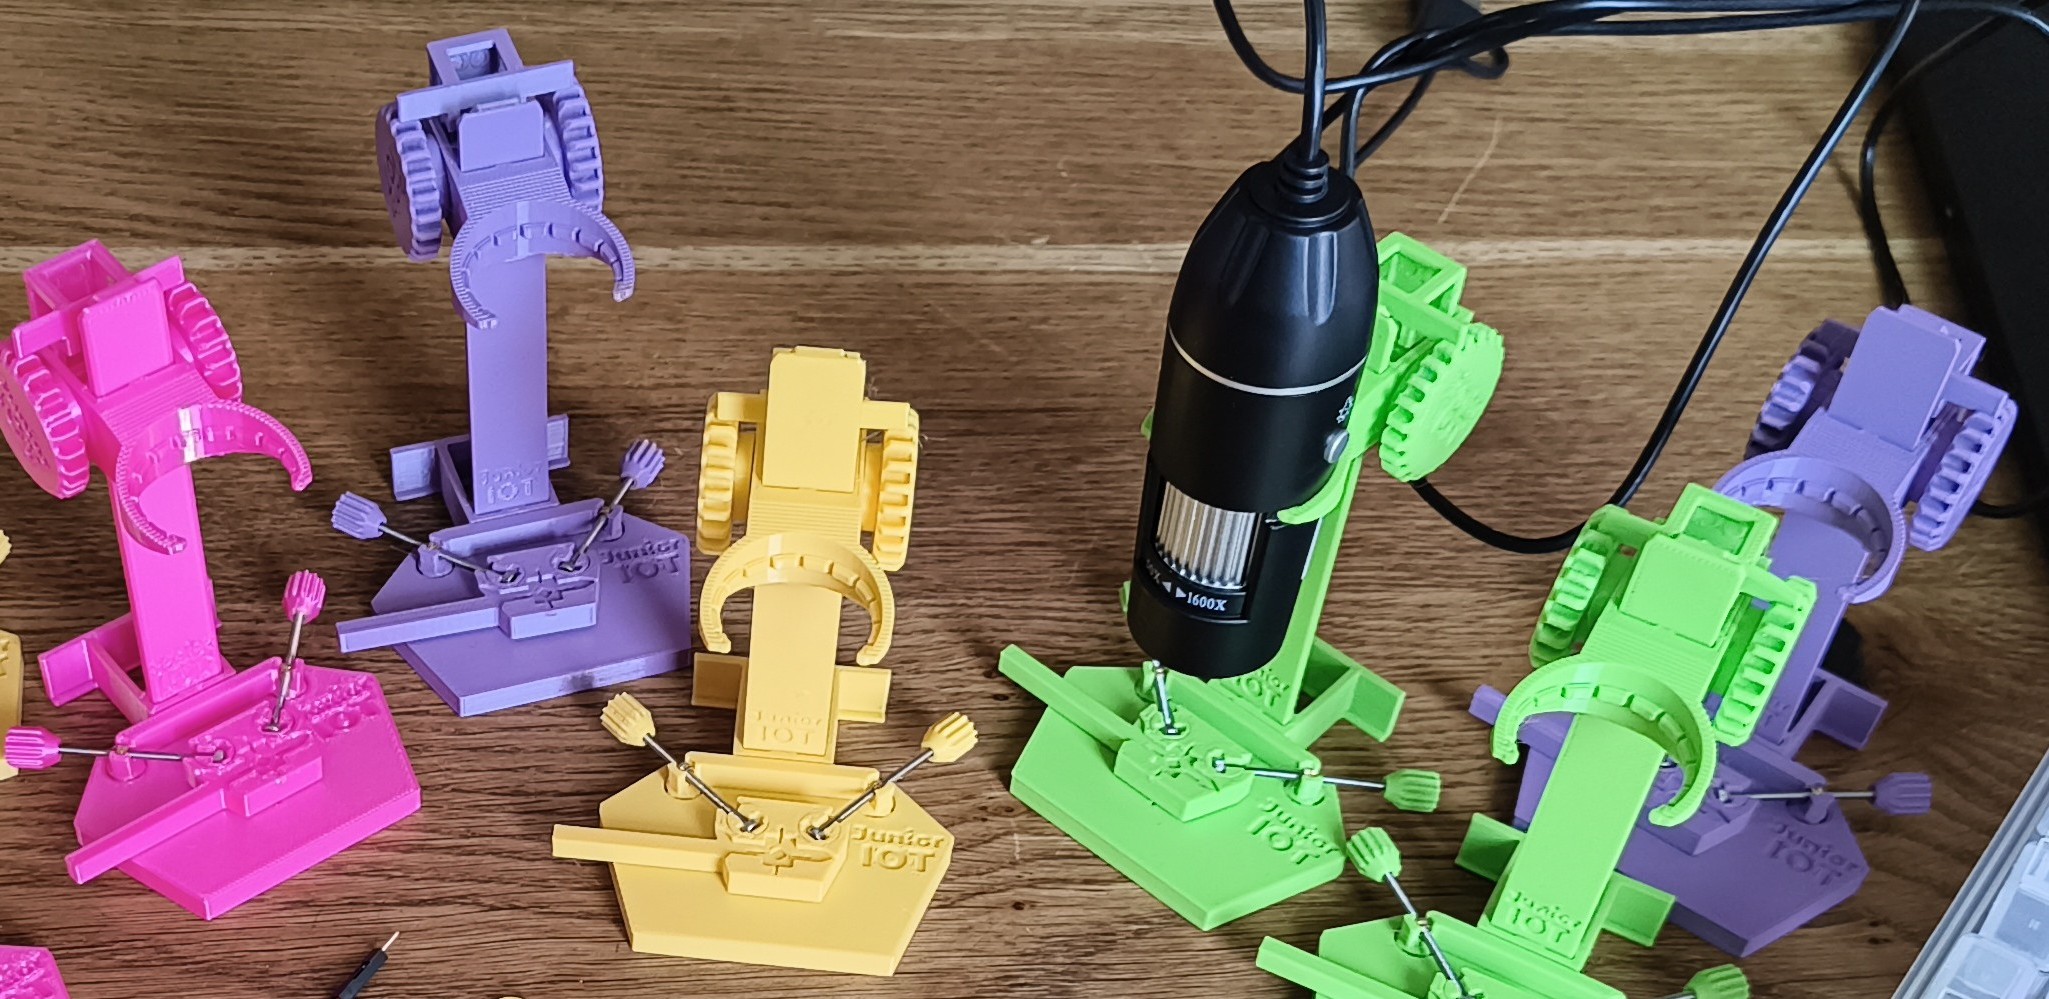
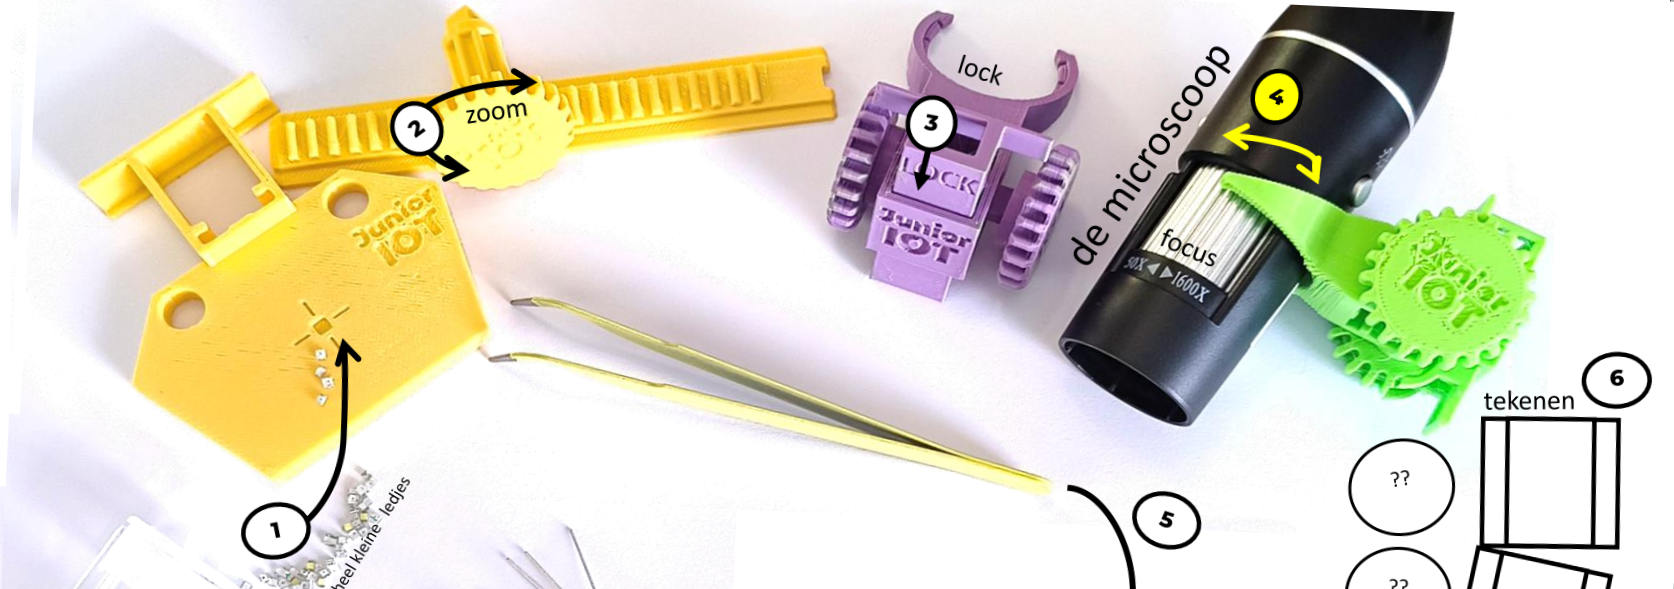
The Junior IOT microscope stand
We designed this stand to hold the camera in place, while you add items to the tiny research area. The pictures below explain the workflow. The steps in your workflow follow the numbers in the pictures.
1. The small item to research is placed into the research area. The size of this area is abut 3 millimeter wide.
2. With the colored turn knob you can bring the microscope up and down. We call this ‘zoom’. Somewhere in the middle is a good start to work with. Tis is about 3 centimeter away from the item you are researching.
–> More distance allows you to view a larger area
–> Closer allows you to see more detail.
3. Use the ‘Lock’ shifter to lock in the distance.
4. The shiny turn knob helps you to adjust sharpness. This we call ‘Focus’.
Now you know how to use our microscope.
Research and sort your LEDs
Now you can do some research. We have collected several types of LEDs into your sample bag.
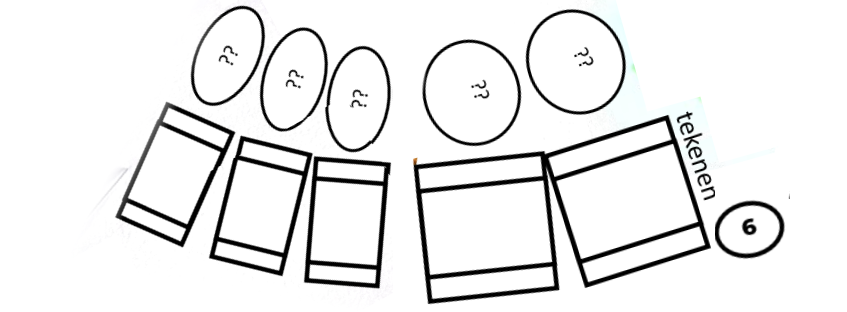
- You will place items onto your worksheet. Make sure to put your worksheet in a handy place.
- Take one sample bag with the selection of LEDs.
- Review each LED in the research area under the microscope.
- Place the LED with the matching image onto the worksheet.

The little ‘collection areas’ give you a hint for the colors of the LED: Red, green, yellow, blue, white, RGB, Blink and Blink fast. There is even a picture for a programmable LED.
Draw your own image
For some LEDs we have not yet prepared an image.
- For each LED without an image, you can add your own drawing.
 While working to sort all the LEDs, you’ll discover how to work carefully to not mix up the LEDs you just sorted.
Extra: Make light with a mini-LED
This part is optional, but it is fun to do!
In earlier exercises you have used a regular led with a battery to make light. You discovered that sometimes you may need to flip the battery.
The tiny LEDs we used with the microscope we call SMD LEDs. This is short for ‘Surface Mount Device’, which explains why it does not have the long pins. These are harder to put onto the battery.
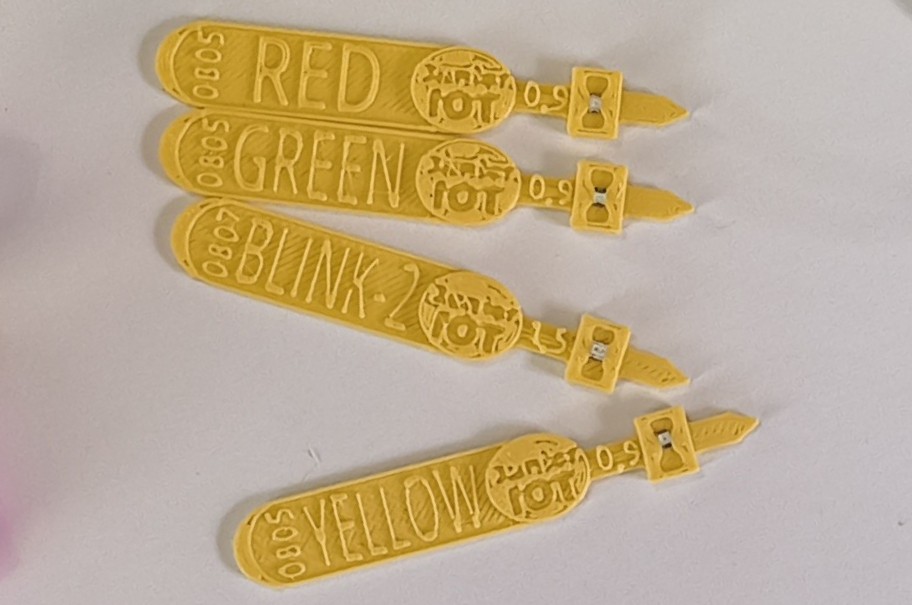
We have found a cool way to connect these tiny little SMD LEDs to the battery:
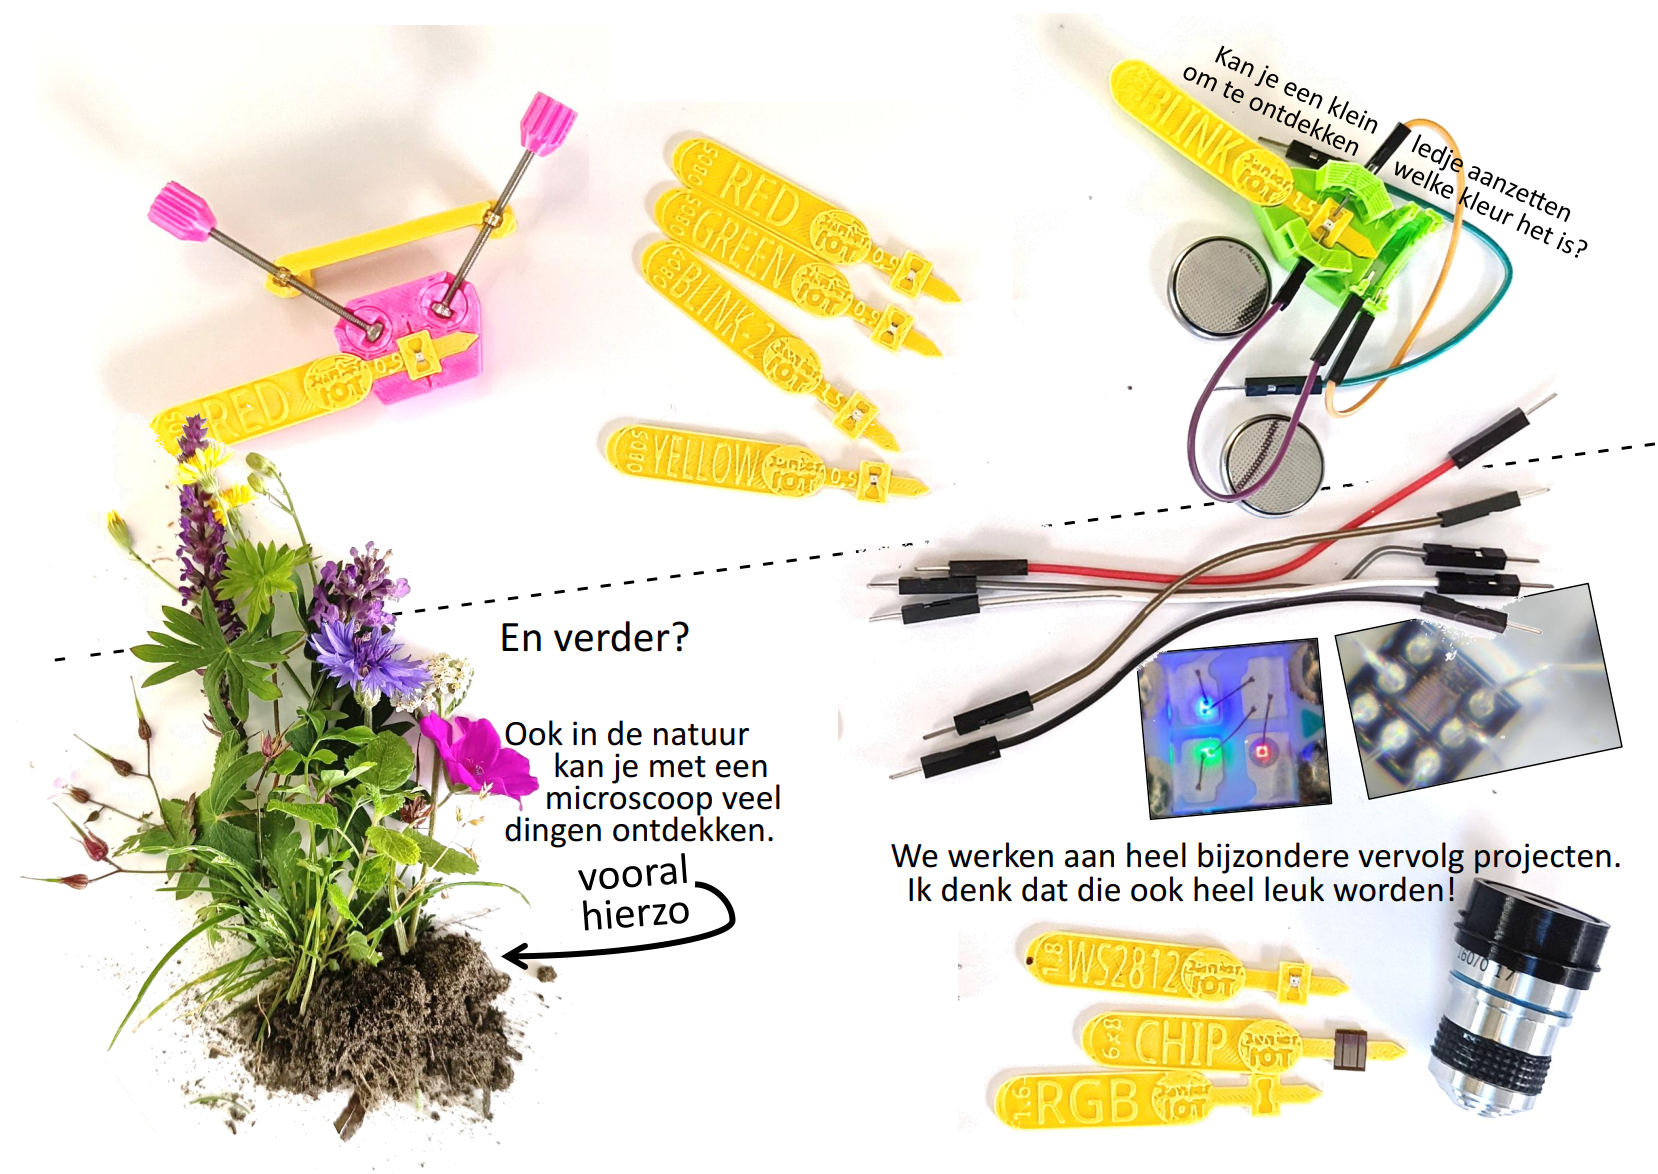
- Find the SMD holder that matches with the SMD LED:
- The red, green, blue, yellow and white LEDs are the smallest. For these we have a holder marked ‘LED 1’.
- The RGB LED is 1,6 millimeter wide, and has a holder marked ‘RGB’.
- The princess LED is 1,8 millimeter wide. The holder has the word ‘BLINK’.
- You can also find a ‘programmable’ LED with a holder ‘WS2812’.
- Slide the LED into the holder. You have to slide it in from the side and push it into the middle, where it almost gets stuck. You can use tweezers and use your nails to get this done.
Find a battery holder. Find two connecting wires with on each side a connecting pin. Find a battery.
- Place the battery into the battery holder.
- Place the SMD holder with the LED into the battery holder.
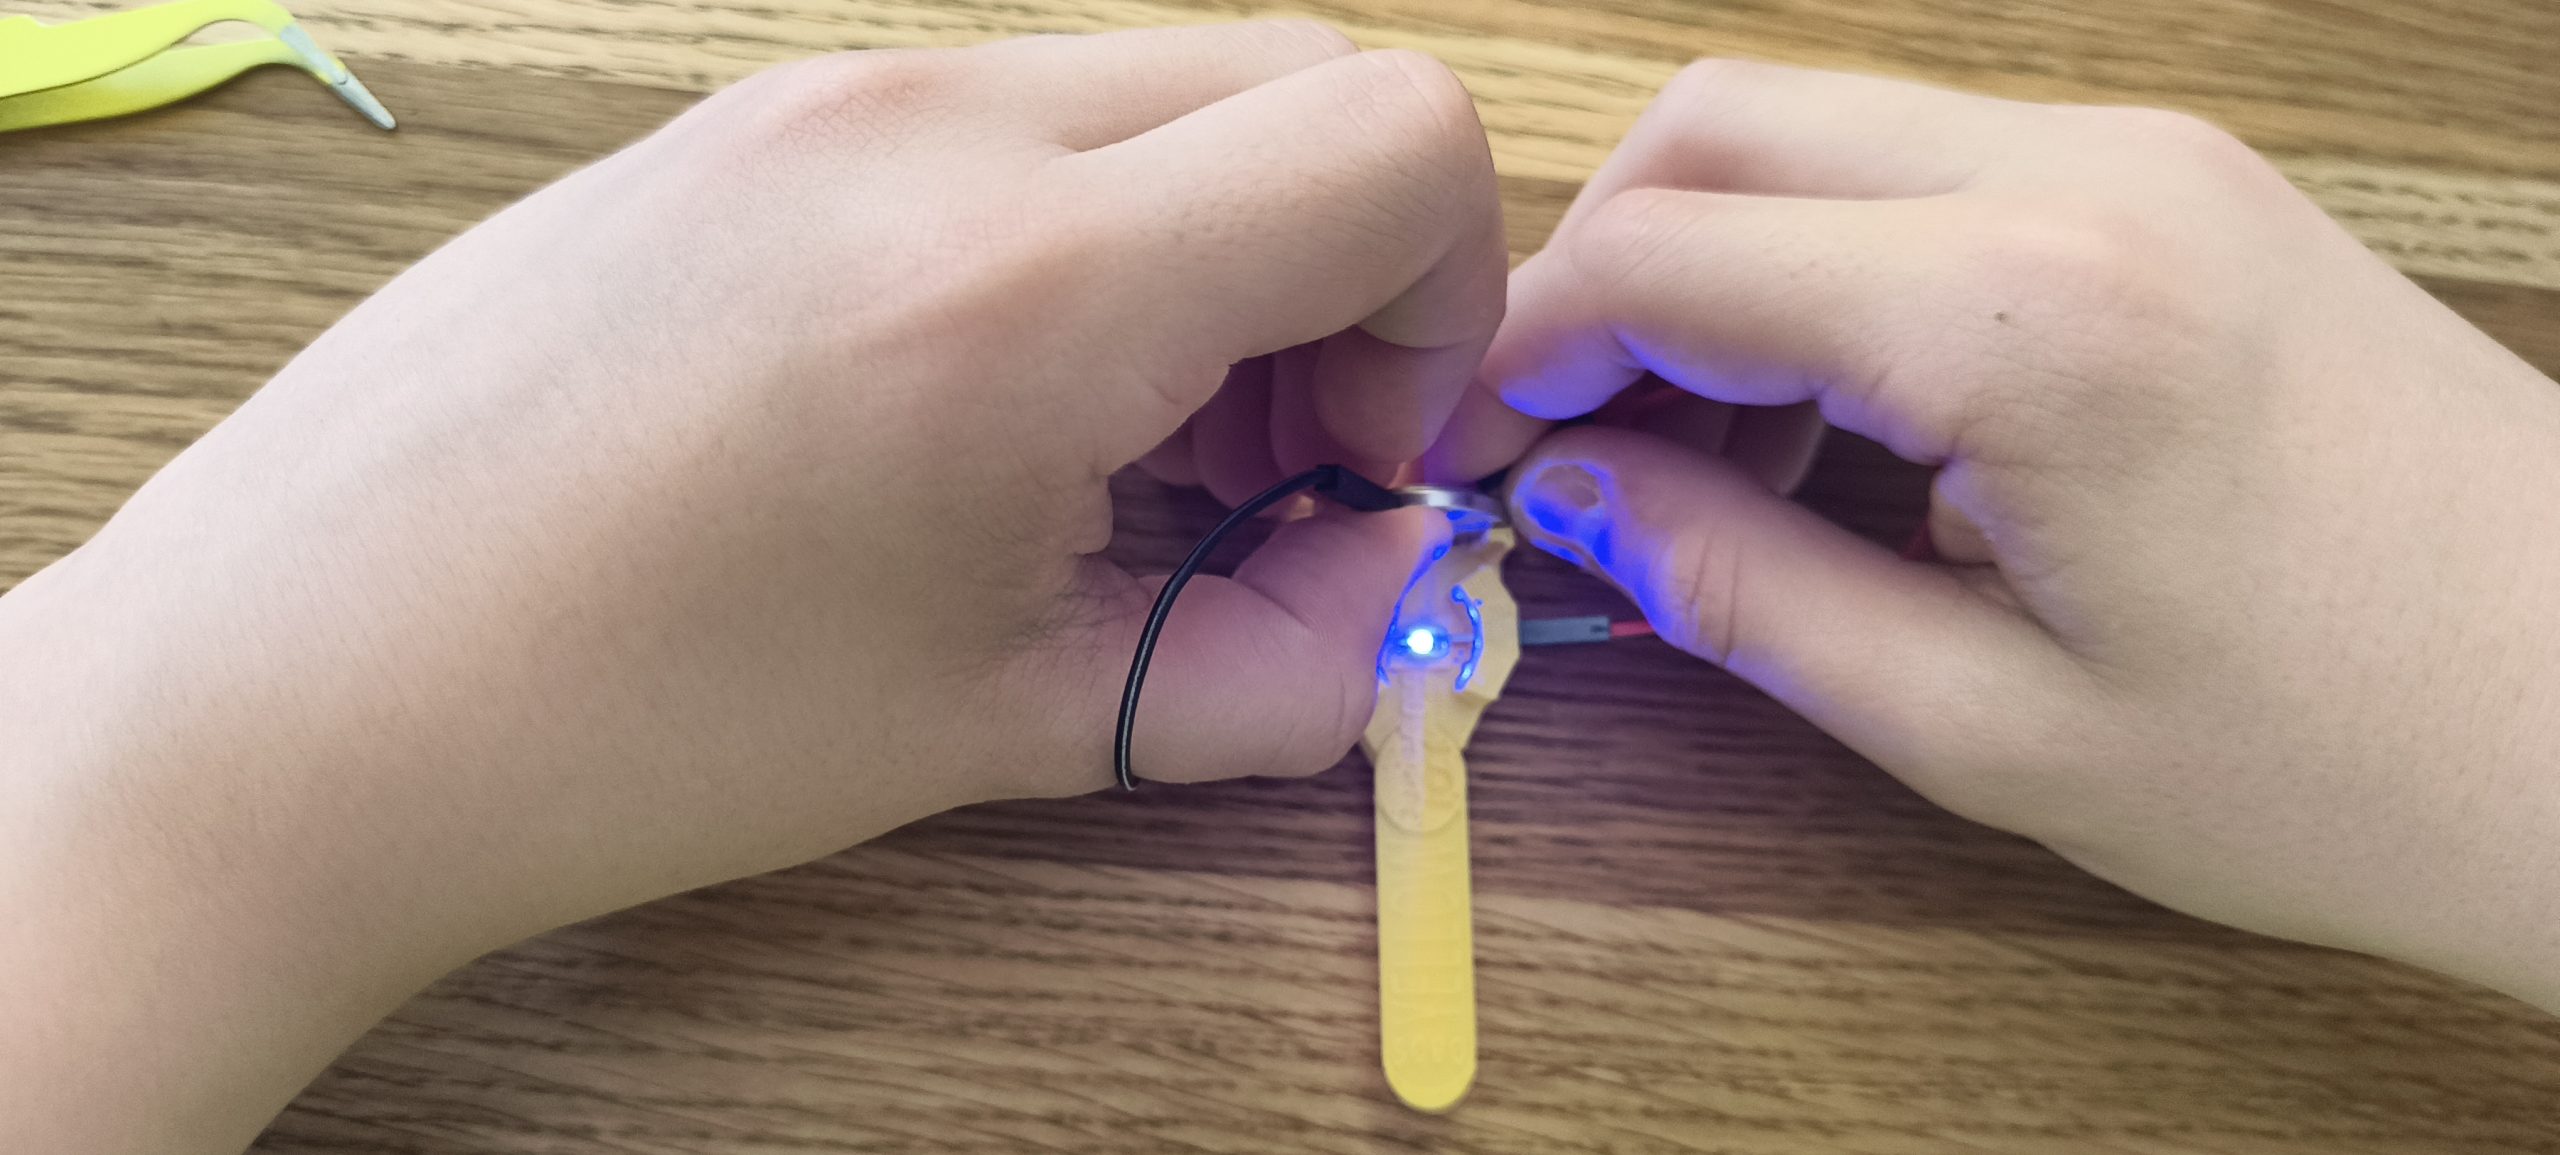
- Carefully insert the connecting pins towards the SMD, and connect the other side with the battery.
- You may need to wiggle the connecting pins onto the LED to make light. You may need to change the connections to the other side of the battery.
Did you make the LED work?
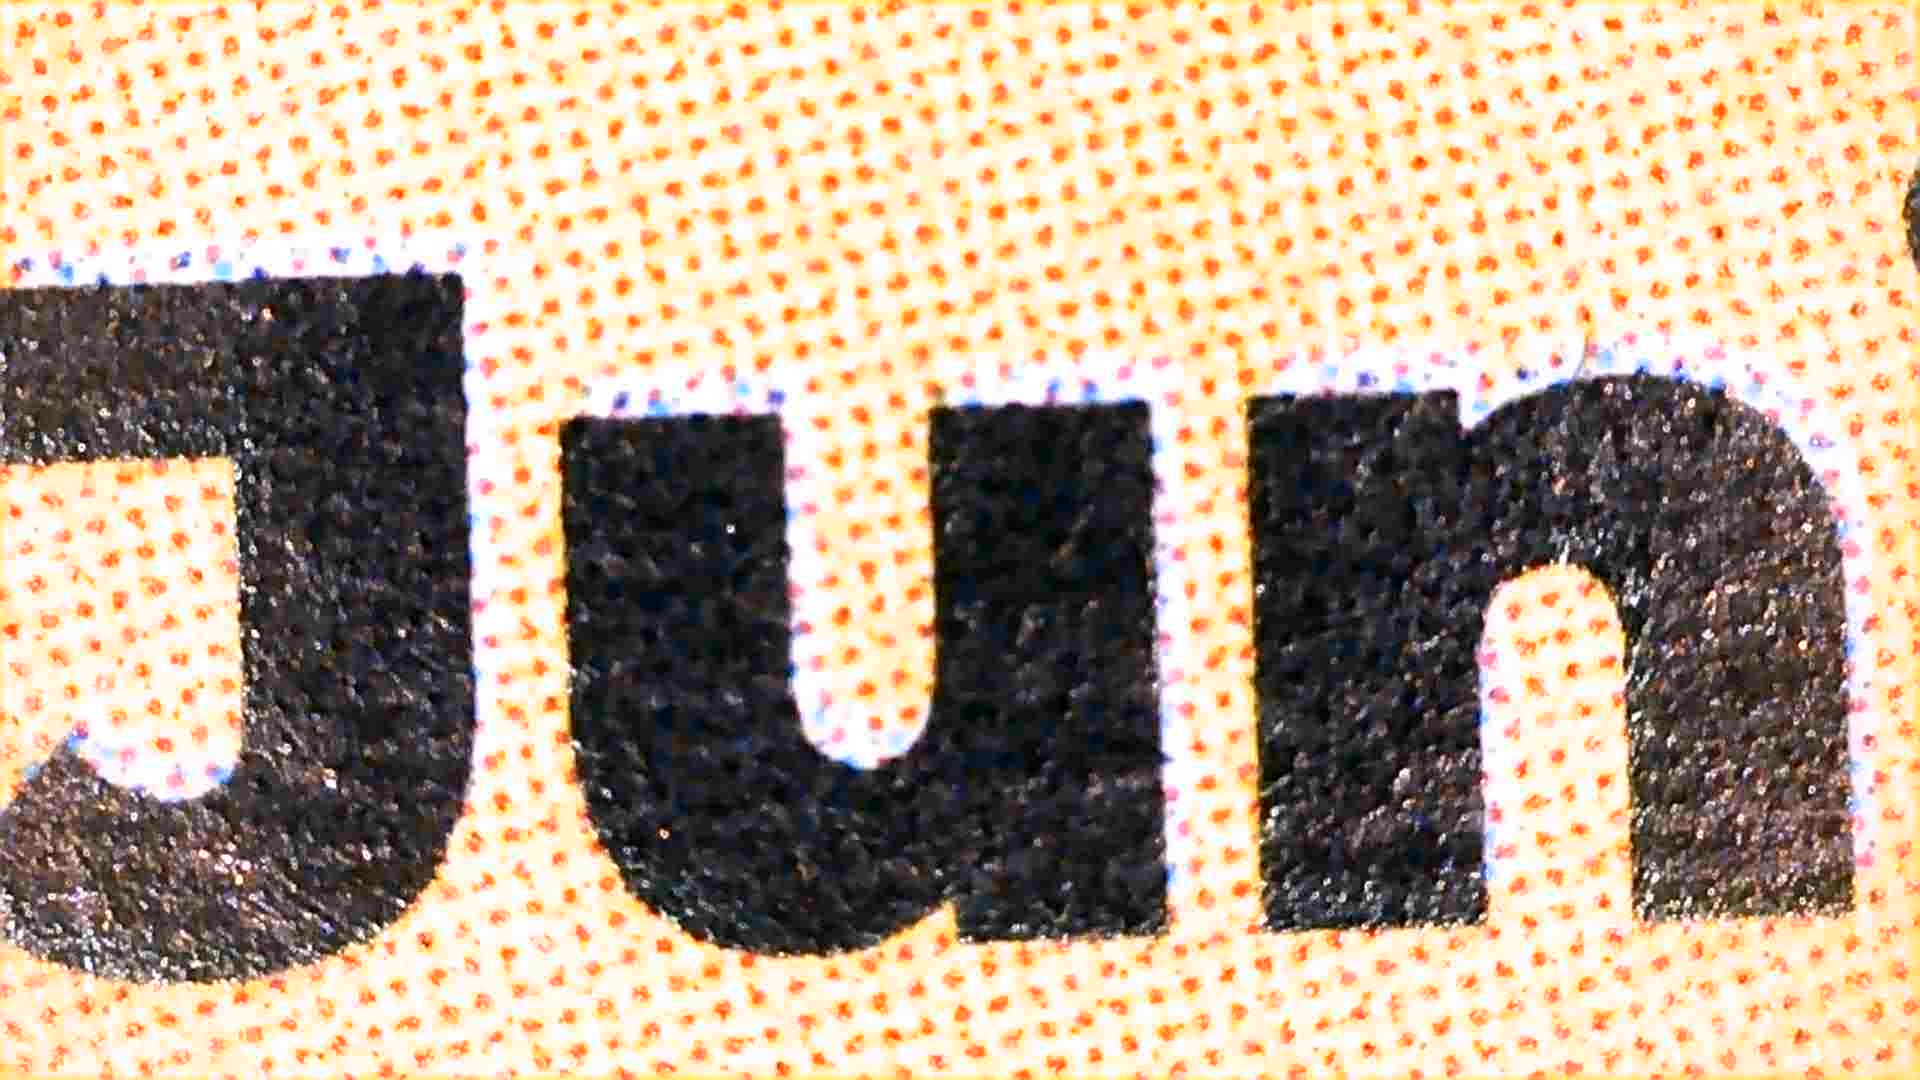
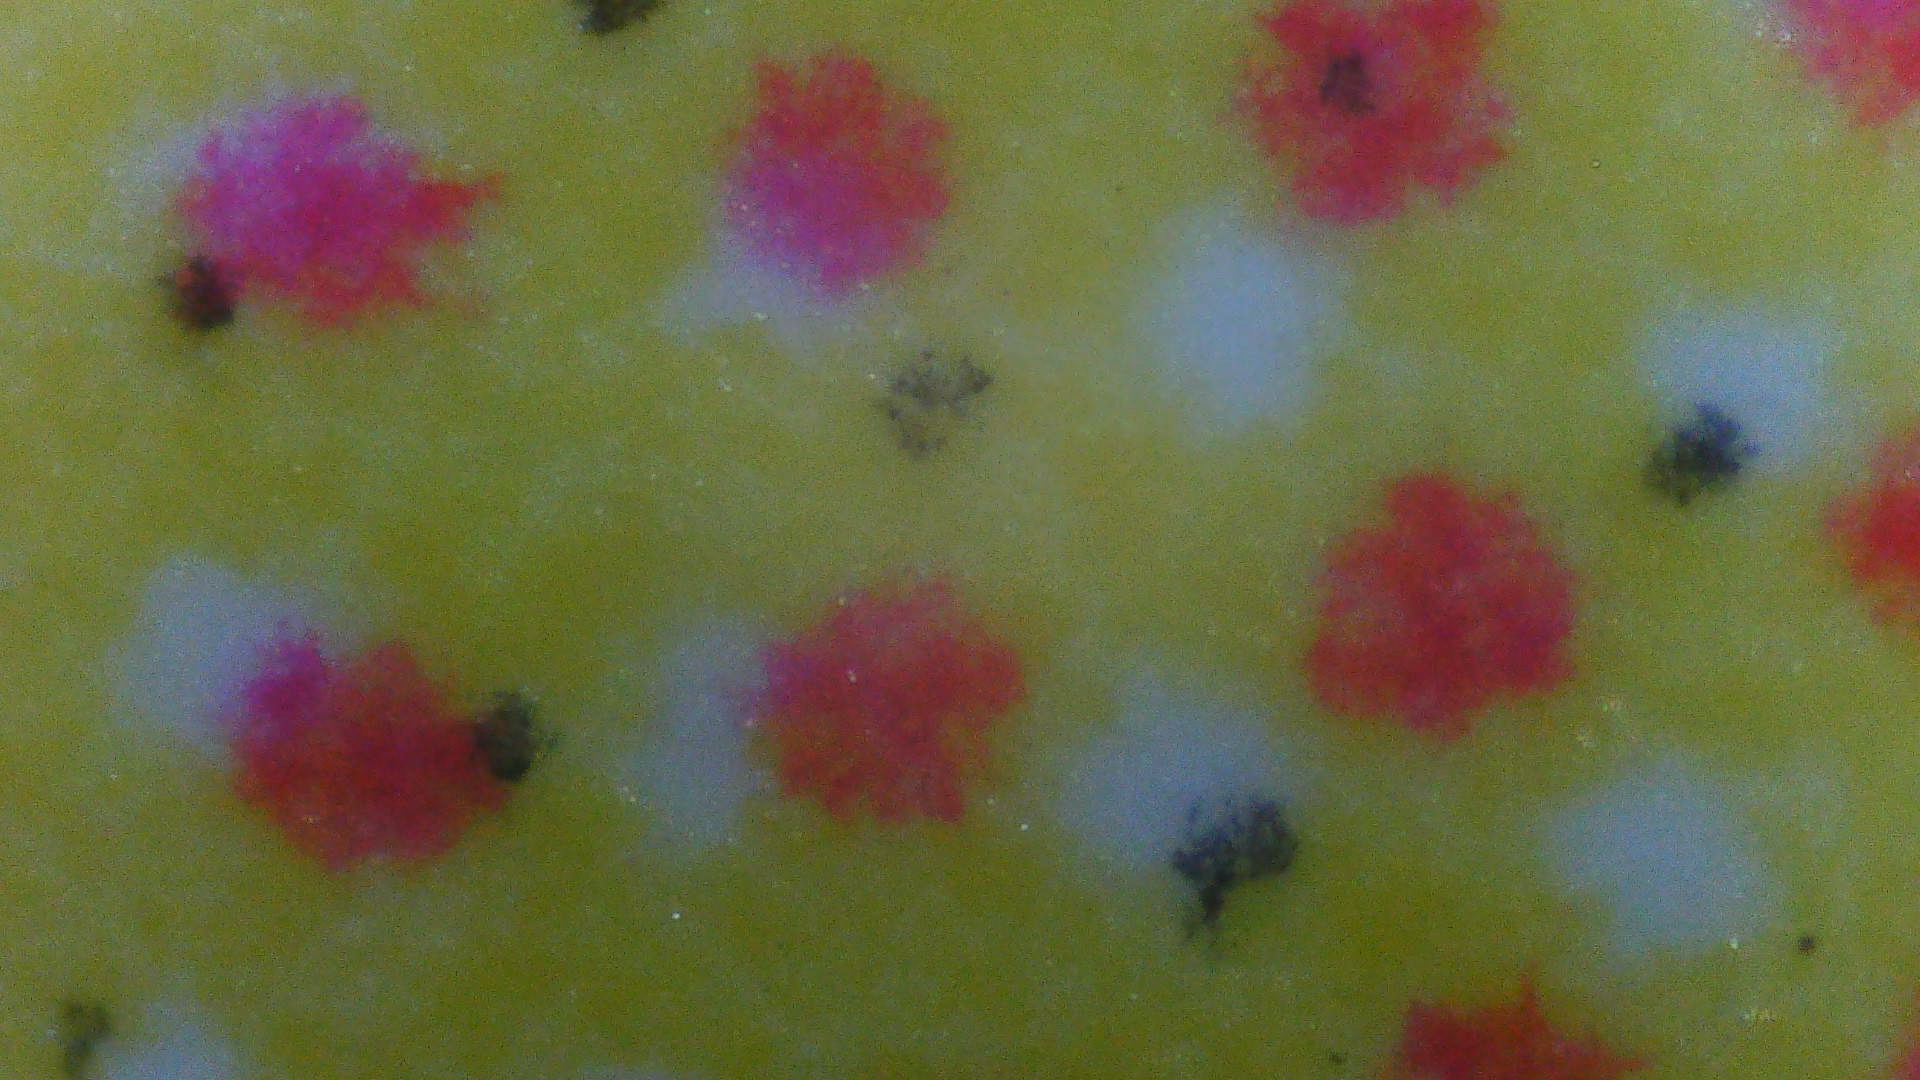
What is this image of the card?
As a fun extra, you can put our printed card under the microscope. You will discover that the orange section of our card is not made with orange ink; but actually is a mix of different dots:
The pattern of dots may help us find a nice sharp focus. We have used our card as a background for our detailed photos:
With an extra strong microscope, we have discovered how the details in some prints may appear as complicated patterns:
Extra: More words for the items that we have discovered
You do not have to do this part of the exercise.
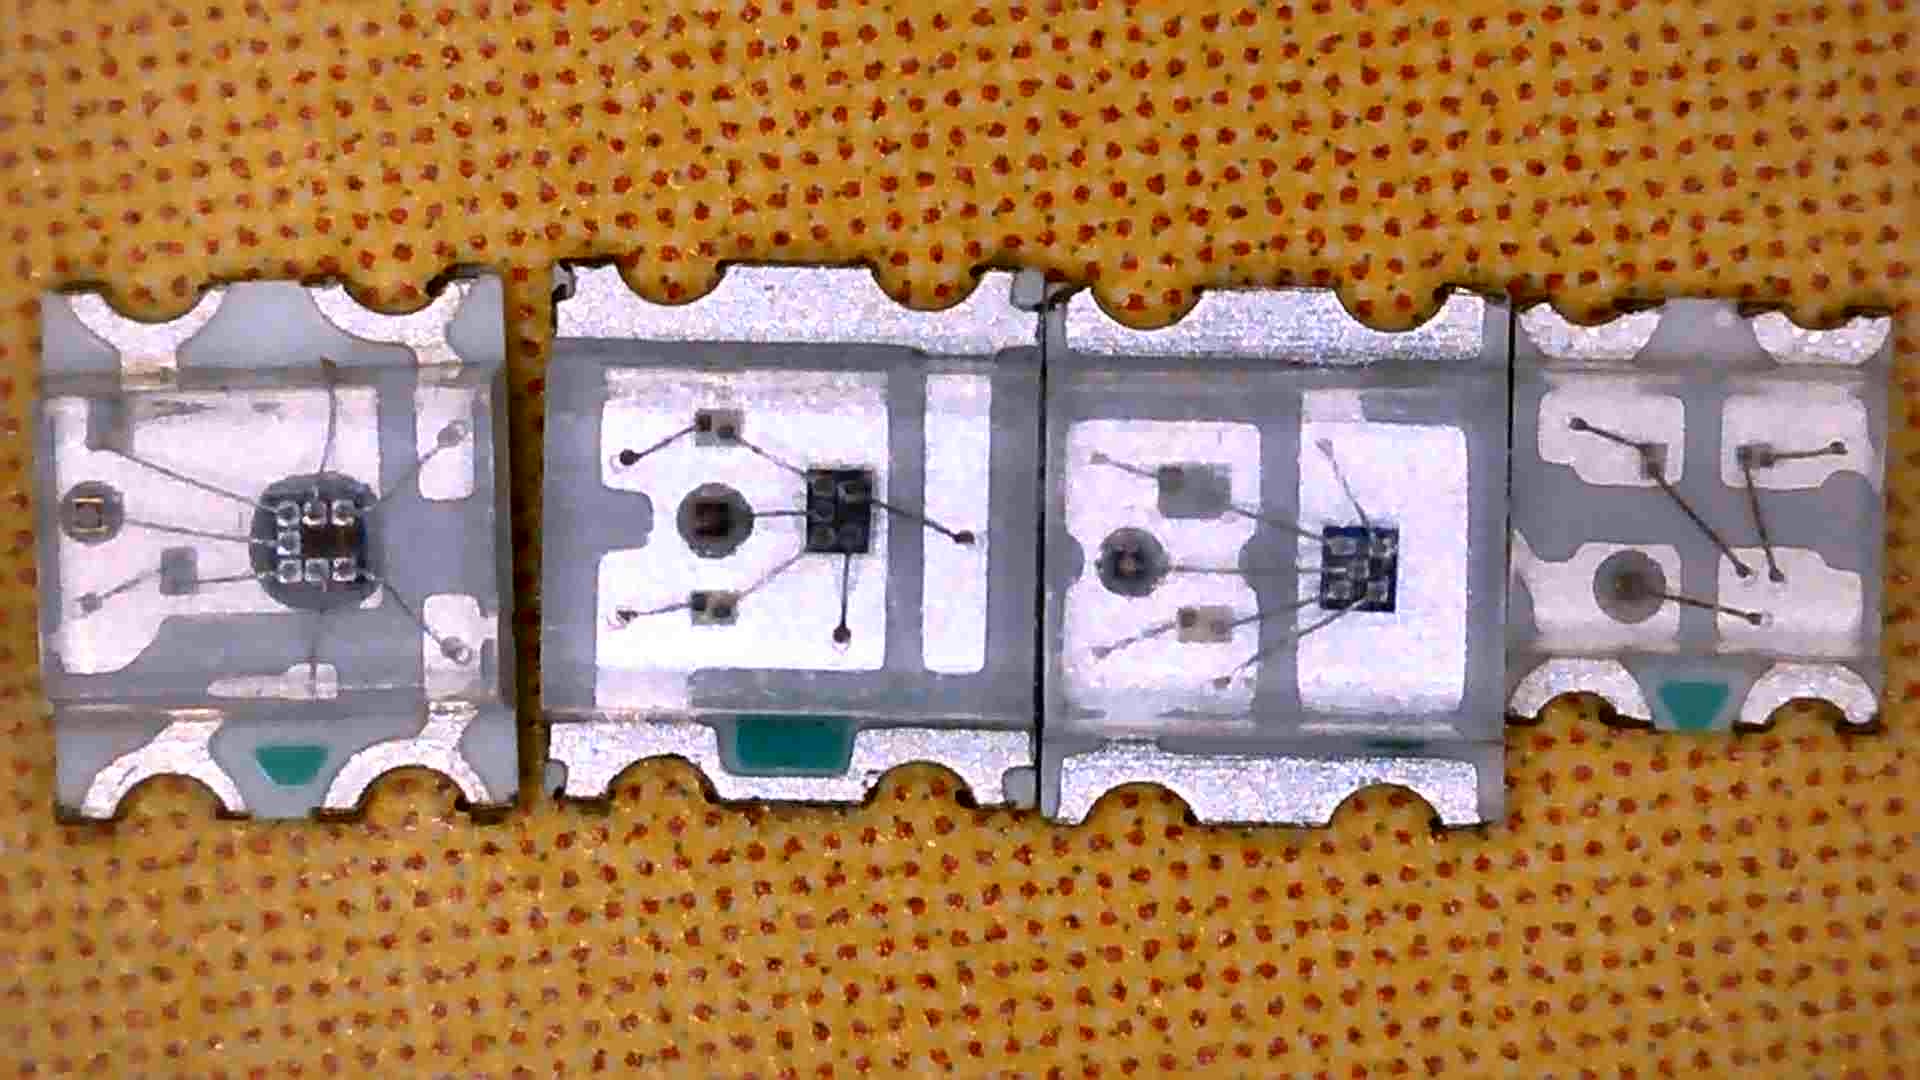
By looking trough the transparent part of the LED we have discovered different patterns and different items inside the LED. Some of these items have special meaning. Knowing what these are may help you in understanding how chips are created. Without chips, your computers, telephones, and many other devices would not be able to work.
Below is a list of different items. Can you tell which of these you have seen in your research? You do not need to remember the names.
- The outside container. Have you seen that this outside is made from a transparent material? All parts are safely packaged inside this material. In the chips industry this is called packaging.
- Connecting wires. This creates the electrical connection between the components. These wires are 0,015 millimeter wide. This is 15 micrometer or 15 μm. This connection is called Wire Bonding.
- The led-chip. THese are the tiny pieces that give light, for example red, green or blue. These are small pieces of semiconductor materiaal, which in the factory are part of a bigger round ‘wafer’. These ‘light blocks’ are also a little chip.
- Chip. In the Blink LEDs and in the special WS2812 you can find a bigger control chip. Usually we cal this ’the chip’. This one switches the colors on and off in the desired order. The chip is made from semiconductor material, which in the factory is part of a bigger round ‘wafer’.
- Semiconductor circuit. All electrical connections are part of a circuit. Also on the control chip, on the semiconductor material, you can find a circuit. Our microscope allows you to find the top layer of this circuit. Such a circuit is built from many layers on top of each other. In a different workshop we can look at these layers, but we will need a much stronger microscope.
These descriptions may give you just the rights words to help you discover more information on the internet!
What can we do next?
After this workshop may follow more challenges. Can you switch on the three colors of the RGB SMD LED? Can you program the WS2812 NeoPixel led using pictoblox? Can we use an extra strong microscope to find out which letters the designer embedded into the princess LEDs, and what are the other tiny structures for? Can we create our own circuit on a semiconductor chip? I am curious how far we will get in this chips workshop series.